Friday, 28 April 2017

MINI RING DOUGHNUT RECIPE

Close your eyes! Think about that gratifying feeling you get when you sink your teeth into a hot sugar coated ring doughnuts, the softness, the lightness and a sip of a cold milk shake...Did I just describe an over indulgent episode . Open your eyes, head straight for the Kitchen and lets start cooking.


Ingredients 
250g of Plain flour
20g of butter
7g of yeast
2 tablespoonful of Sugar
1 teaspoon of Vanilla extract or Grated Nutmeg
75ml of warm Water / Milk
A pinch of salt
1 litre of Sunflower oil

For a richer texture you can use an egg (this is optional), however it's my preference.

Tip 
The doughnuts brown quickly when you use milk.

Sugar
Adding too much sugar prevents your dough to rise. If you want to add more Sugar, you need to double the amount of yeast.


Add the Salt, Flour, Yeast, grated Nutmeg, Butter and Egg to a mixing bowl.

By hand
With clean hands mix everything together and slowly add the warm water.
Keep mixing till well combined and form a ball with the dough.
Transfer the dough to a clean, floured surface and knead it with the heel of your palm (always pushing the dough away from you) for about 20 minutes. You need to achieve a glossy, smooth and shiny dough. This process is to activate the gluten in the flour, soften the dough and enable you to achieve a light and fluffy doughnut
This process will make you burn a few calories as you'll be using your biceps. Great way to reward yourself after the hard work 😓 


Using a Mixer
If you're like me and can't be bothered with exercising your biceps, then use a mixer.
Place all the ingredients in a mixing bowl, attach the bread hook and knead the dough for about 8-10minutes or until the dough has a glossy shine. 


Once your dough has its shine, cover it with cling film and leave it to rise in a warm place for an hour. 
Once risen transfer the dough to a floured surface and roll into a 2cm thickness.


Cut 16 small discs out of the dough using a small cutter.
Using a wooden skewer, make an incision in the middle of each disc. Insert your floured little finger into each hole and swing your wrist at 360 degrees. This will expand the hole further (what a description 🙈) I hope you get the gist of my instructions.


Repeat the process till all the discs have holes as shown below. Place each ring doughnuts on a floured flat baking tray.


Cover the ring doughnuts with an oiled cling film and leave it to rise for a second time for an hour.

 
The ring doughnuts should double up in size now.
Place a Wok with a litre of Sunflower oil on a medium heat.

Tip 
Please ensure your oil is hot enough to fry but not scorching to burn the doughnuts quickly. This should take about 4 minutes on a medium heat. 

Add the doughnuts to the oil (careful not to burn yourself). 
Using a long wooden skewer constantly turn the doughnuts for an even cook.


Once browned (this process takes about 5 minutes) use a slotted ladle and remove the doughnuts into a colander. Place the colander over a bowl for any excess oil to drip into. Alternatively transfer onto a blotting paper to absorb any excess oil.

If you prefer a spiced sugar encrusted ring doughnuts, mix 100g of brown sugar and a levelled teaspoon of cinnamon powder together. Drop  the hot ring doughnuts into the spiced sugar and toss till well covered. 

Alternatively, serve the ring doughnuts with your favourite Marmalade, Jam or Lemon curd. 
Serve immediately with your favourite beverage as you enjoy the views of your garden or sink into reading a good book. 

All photos and recipes are by the owner of this blog.


Find more inspiring recipes on my YouTube channel, 'Ndudu by Fafa'. Don't forget to share and subscribe.

Thursday, 27 April 2017

BAMFO BISI (A SWEETENED FRIED CORN GHANAIAN SNACK)

Ghanaian snacks are a simple affair, in the sense that they require limited and readily available ingredients. Popular snacks include Dzowey, Nkatie cake, Kubey cake, Ayigbe biscuits, to mention but a few.
I'm taking a trip down memory lane to give you this simple and delicious recipe of Bamfo Bissi. It's a gluten free snack made from milled Corn, Sugar and Nutmeg , which is then fried and served with roasted Peanuts or Groundnuts. 

I prefer to serve the Peanuts on the side as I find the Peanuts do burn a bit when inserted into the snack. 

The snack has a crunchy exterior and soft in the middle when freshly fried, however it hardens up when cold. Be prepared to exercise your jaws , if you have it cold. 
Bamfo Bissi is mainly filled with carbohydrates and gives you instant energy, when required. I prefer to have this snack when it's warm with a dipping Peanut / Groundnut sauce. I made a Baobab and Peanut sauce the other day , which paired perfectly with this snack coupled with it's high nutritional content of Vitamin C. 
Enough talking let's start cooking..


Ingredients 
200g of milled corn flour
25g of Caster Sugar
Pinch of Nutmeg 
100ml of water
500ml of Sunflower oil
80g of Roasted peeled Peanuts 


Method 
Mix the water and 100g of the milled corn flour in a saucepan and place on a medium heat.

Mix the corn flour and water together till you form a hard smooth paste. It's the same process of making a choux pastry but will corn flour. This should take about 8-10 minutes.

In a bowl, mix the remaining 100g of Corn flour, Sugar and Nutmeg together.

Transfer the hot dough  into the dry Corn mixture  and mix everything till well combined.


With clean hands, scoop a handful of the Corn dough mixture and roll it in between your Palm to form an oblong shape. 

Insert a few Peanuts into each shaped Corn dough and set aside or alternatively fry it in its plain form and serve the Peanuts on the side.

Pour the Sunflower oil into a Wok or Saucepan and place it on a medium heat.

Test the oil is hot by dropping a little corn dough into the oil. If it sizzles, your oil is ready.
(Please take all necessary precautions when dealing with hot oil).

Fry each corn doughnut till it's golden brown and drain off any excess oil on a blotted Kitchen paper.


Serve immediately with roasted Peanuts and a glass of cold Watermelon juice.

Find more inspiring recipes, like how to cook the perfect Waakye on my YouTube channel,
'Ndudu by Fafa' and don't forget to subscribe.


All photos and recipes are by the owner of this blog.

Tuesday, 25 April 2017

THE GHANAIAN OMELETTE (CHIIBOM)

As most Ghanaian Omelette goes, it's always a decadent and colourful affair.
Omelette is enjoyed at breakfast or a late night snack (especially for the club goers in Ghana) and enjoyed as a sandwich. 
Omelette sandwich does come in handy as the greasy option after a drunken night. It's fair to say , Omelette is to Ghana as Khebab is to the UK on club nights. It's easy to make and equally tasty.

 
The popular reference to 'Chiibom' (yet again spelt phonetically ) means all fried together. You can be creative with the type of vegetables you include from grated Carrots, steamed Cabbage, Mushrooms etc 

 
This recipe serves 2 very hungry people or 3. Best to divide the recipe in two, for two individual portions.

For the list of Ingredients, you'll need;
6 free range or Organic eggs
30g of Chopped Spring Onions 
1 small thinly sliced white Onion
1 medium diced Tomatoes
1 finely chopped Green chilli
1 levelled teaspoon of salt 
3 tablespoonful of Sunflower oil.

Method 
Crack the eggs into a bowl, add the salt and whisk till well combined.


Add the Spring Onions, White Onions, Chillies, Tomatoes or your preferred vegetables and mix well


Place a frying pan on a medium heat and add the oil.
Heat the oil up for 45 seconds and add the omelette mix.


Fry for 3 minutes on each side or when it starts to brown and the edges starts to rise. Turn the Omelette with a spatula or to show off, skilfully flip the Omelette by lifting the frying pan and flicking your wrist 180 degrees to one side.


Once you've cooked the Omelette to perfection cover with your plate as shown below and turn over with the frying pan facing up.

 
Serve immediately with either Tea Bread  or Sugar bread for breakfast or as a snack. 


Better still enjoy it with Angwa Mo for lunch. 


All recipes and photos are by owner of this blog. 
Find more inspiring recipes, like this Omelette stew with boiled Yam, on my YouTube channel 'Ndudu by Fafa'. Don't forget to subscribe and share.


Thursday, 20 April 2017

PUY LENTILS & RED SNAPPER

'Puy Lentils', are from the French city of Le Puy-en-Velay,and they're the only lentils that hold their shape after cooking. They have a peppery taste and when combined with goats butter, it adds a nutty taste. Most Puy lentils are readily available as pre cooked packets, however try your local grocer for an uncooked one. They're easy to cook and taste much better when cooked from scratch. This is a quick and easy to follow recipe. Try the recipe, leave a comment , subscribe and share. This recipe will be available on my YouTube channel 'Ndudu by Fafa'.

Ingredients 
250g of Puy lentils
600ml of water
25g butter

Red Snapper
2 tablespoonfuls of olive oil 
15g of roughly chopped fresh rosemary
1 diced green chilli
15g of julienne ginger (sliced into thin long strips)
2 large sliced onions
2 roughly chopped large tomatoes 
2 medium Red Snappers (ask your fishmonger to gut and clean the fish)

Mushroom sauce
1 teaspoon of butter
1 tablespoon of olive oil
150ml of white wine
1 finely sliced banana shallot
50g of washed & chopped Shitake mushrooms 
10g of fresh thyme
Salt and Pepper to taste

Method;

Puy Lentils 
Place a saucepan with 600ml of water on a medium heat. 
Add the Puy Lentils and cook for 15-20 minutes or until soft with a bit of a bite. 

Once cooked, add the butter and stir.


Red Snapper 

Preheat your grill to 200*c
Score the fish into a diamond shape, by slashing it diagonally (in opposite directions).
Place the fish in a roasting dish


Sprinkle  the chopped rosemary, olive oil and ginger over the fish. 
Add salt and pepper to taste. 
Rub the fish with the rosemary and ginger mixture.


Add the tomatoes, chillies and onions to the roasting dish. (The tomatoes will lend their juice and taste to the sauce)


Sit the fish on top of the mixture and place under the grill for 15-18 minutes  


Take the fish out of the grill and leave to rest for 3 minutes 


Mushroom sauce
In a frying pan, melt the butter and add the olive oil (this will prevent the butter from burning)
Add the sliced shallots and fry on a gentle heat for 2 minutes.


Add the mushroom and stir till well mixed.
Fry for another 2 minutes and increase the heat


Add the wine ( taking care not to splash on you).
Cook for 2 minutes and turn the heat down. 
Add the thyme and stir. 


Add salt and pepper to taste and stir.
Remove from the heat and set aside for later.

To serve
Scoop a ladle of the Puy Lentils to a pasta bowl and drizzle some of the fish juices over it.


Top it with a portion of the the mushroom sauce and a portion of fish. 


Sprinkle with either parsley or Greek basil


Best served with White Rioja . Enjoy!
All photos and recipes are by the owner of this blog


Wednesday, 19 April 2017

CRUMBLY SHORTCRUST PASTRY RECIPE

Homemade, shortcrust pastry is not as scary as you think, to make. Most people shy away from making their own and settle for a shop bought option. Try practising this easy to follow recipe and be creative by adding different herbs and spices.  Be warned, you might just keep making your own pastry , after trying this recipe. Try the recipe, leave a comment, share with friends and family and don't forget to subscribe. 


Ingredients; 
Serves 8
Short crust pastry
500g of plain flour
1 tablespoon of baking powder 
2 large, beaten free range or organic eggs. I prefer using duck eggs for my pastry (as it makes for a lighter pastry).
250g of cubed cold butter 
Salt and pepper to taste
1 teaspoon of Thyme (Optional)
Try adding spices or herbs to the mix, for added flavour. 


Sift the flour, black pepper and baking powder into a bowl.
Add the salt, cubed butter and rub between your fingers till you have a breadcrumb consistency.


Alternatively add the flour , pepper, baking powder, salt and butter to a food processor and pulse to a breadcrumb consistency. This should take less than a minute.


Add the beaten eggs to the flour to form a dough. 
Please don't overwork the dough. You want it crumbly, crunchy and moist, when cooked. 


As you'll notice above, the dough is crumbly and not overworked. 


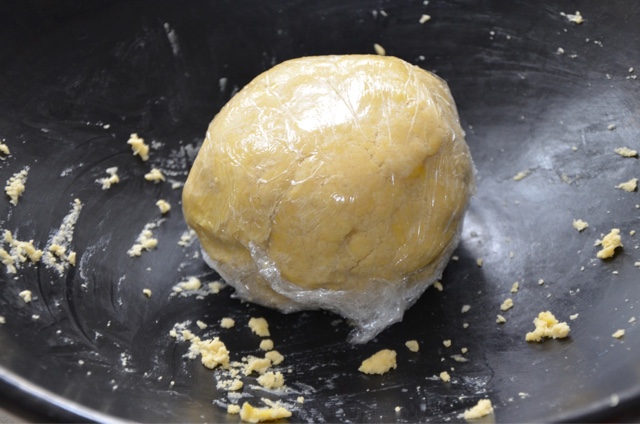
In the name of not overworking the dough, I cover the dough with a cling film . I scoop the contents into the cling film and roll it into a ball. 
Wrap the dough in a cling film and place it in the fridge for about 45min. 


Sunday, 16 April 2017

GARI PIÑON SCOTCH EGG

You're mad, said my friend in a rather endearing tone, (when I told her I made Gari Piñon Scotch egg).'Yes, I'm mad for good food' was my response with my high pitched enthused voice, as I bit into each morsel. You can be creative with the recipe and include shredded Beef or Chicken into your Gari Piñon
This is a perfect starter for any dinner party, Easter lunch or enjoyed as a snack. 


Ingredients
400g of Gari Pinon
4 eggs
Water

Utensils
Saucepan
Cling film
Chopping board
Rolling pin. 
To start 

Fill a saucepan with water and place on a medium heat. Just when the water begins to boil, (using a spoon) lower each egg into the hot water. Boil the eggs for 1 minute and take it off the heat. 

Cover the saucepan with its lid for 6 minutes for a softer egg yolk or 10 minutes for a hard boiled egg.  

Peel your eggs and leave it aside until needed. 

Place 100g of the Gari Piñon in cling film. The cling film should be big enough to cover the Gari Piñon. Using a rolling pin , roll the Gari Piñon into a flat shape. 


Place an egg in the middle of the Gari Piñon, as shown above. 


Wrap the Gari Piñon around the egg with the help of the cling film, into a nice ball. 


Repeat the process until you've used up both the eggs and Gari Piñon. 


Serve the 'Gari Scotch egg' with Avocado slices, Sautéed Mushrooms or any protein of your choosing. 

Happy Easter everyone. 
Find more inspiring recipes on my YouTube channel, 'Ndudu by Fafa'. Don't forget to subscribe and share.

All photos and recipes are by the owner of this blog.


How to bake the perfect whole Fish